4 Pros: “Hidden” features of 4Sync desktop app for Windows
Being a 4Sync user, you have probably got a clear understanding of the main features in our mobile and desktop apps. However, if you’re new to 4Sync, there’s a slight chance that you haven’t discovered all helpful options, available to you, yet.
Well, here are a few tips on how to get the most of the 4Sync desktop application for Windows.
Direct file & folder sharing
Sharing a file or a folder from 4Sync on your Windows computer is super-easy and fast:
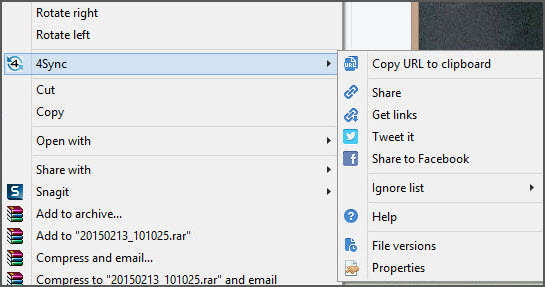
- Open your 4Sync folder and right-click a file or a folder.
- Expand the 4Sync menu list and select the sharing option you need.

In particular, you may copy the file links to clipboard to paste and send them via e-mail or various IM apps, share files via Facebook or Twitter and more. You can also manage access permissions to a specific folder at 4Sync directly in the older-sharing pop-up window.
Synchronization of external folders
By default, the 4Sync desktop application for Windows only syncs the contents of your 4Sync folder. Yet, you can sync any folder on your computer with your 4Sync web account without changing its current location:
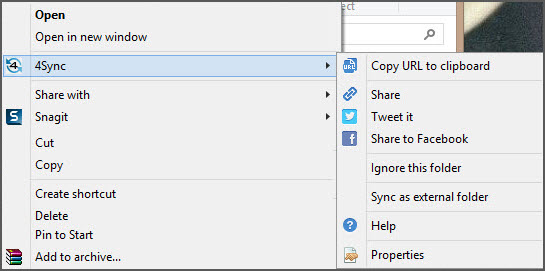
- Right-click the folder you wish to sync with your 4Sync web account.
- Select “Sync this folder” from the list of options.

The folder will be uploaded to your 4Sync cloud storage and accessible from your other computers and devices.
“Ignore” lists for files and folders
Adding files and folders to an “Ignore” list at 4Sync enables you to cancel their synchronization. Expand the “Ignore list” option in the 4Sync menu and select whether you wish to stop syncing a particular file or all files of a certain type (e.g. all .jpg files). Vice versa, if you wish to sync the file from your “Ignore list” again, go to “Ignore list” and click “Synchronize filename”.
Similarly, select “Ignore this folder” in the 4Sync menu to add a specific folder to the 4Sync “Ignore list” or click “Sync this folder” – to begin syncing it again.


No Responses
Leave a Response